Tube Box

Why the new tube boxes?

Price wise, they are about the same.  We could use the smaller cardboard tubes on Brandywine because it fit.  We can get longer cardboard tubes made but they are going to  be a problem.  When pieces get wedged and stuck in the bottom, there is no way to get them out!  It is too long and narrow to reach with your hand and you can’t remove the bottom.  Huge problem.  This is going to be a bigger problem with bigger battles and more pieces.  I’m thinking we are going to need bigger bags to fit all the Gettysburg pieces in!


It’s not just Marengo either.  Gettysburg will have huge maps.  Chancellorsville.  Waterloo if we include all the matching campaign maps.  Our Pirate game.  Dracula.  Our strategic game in Europe. 


It will greatly streamline production and inventory if we have 1 system that is versatile and works for everything.  There are other advantages as well:


  • Air tight, helps prevent yellowing with age
  • Water tight, helps prevent damage
  • Lighter, decreased shipping & packaging costs.  This is a big deal for our international orders.  We’ve been trying to absorb most of the extra charges but it really adds up.
  • Bigger diameter which reduces the rules ‘curl’ effect.  That helps.
  • Virtually no shelf wear on the box because everything is protected on the inside. 


This type of storage is nearly bomb proof.  The game should look virtually brand new in 50 years with this.


The downside is that it looks more modern.  Not period like the cardboard and metal.   …but then we got to thinking.  Industrial cardboard tubes with pressed metal caps aren’t really ‘period’ either.  They couldn’t make those back then. 


That got us thinking about what would be period?  Probably something leather or wood like these.

So maybe it would be better to go with light and efficient and then offer the fancy tubes as extras for the people that want them.  We might be able to get them in bulk from India / China.  What do you guys think?


Bigger is Better -Marengo

Design Notes:

Compared to Brandywine, the Marengo map is huge!  There are pros and cons.  This was our assessment. 

Pros


Wide Open Feel

My favorite games are usually strategic.  Why?  I always wonder what is past the edge of the map?  Why can’t I go there?  I know.  I probably wouldn’t go there anyways but still. 

We started play testing on the full big map.  We figured at some point we would crop it down to a more manageable size.  What stood out to me most about Marengo is how fluid the battle was.  This is a battle of maneuver over a wide field of mostly clear terrain.  Refreshing!  I loved that feel.  Very spacious.  Luxurious.  Very Napoleonic.  Cropping it down would cut costs and save space but it also makes you feel more boxed in.

Beautiful Artwork

One of the most striking and detailed parts of the map was Alexandrie.  The problem is, that wasn’t really part of the battle.  Still, it seemed a shame to just hack that and the river off.  We noticed that by leaving it on, it opens up several strategic options for the Austrians.  They could attack straight up the center.  They also have maneuver options to the north and south.  Even combinations of the three.  There we go.  Now we have some justification for beauty. 

Historical

If that wasn’t enough to convince you, consider the historical value.  This is based on the real French map of the period on the battle.  It felt wrong to cut off and just provide part of the historical map.  Wouldn’t it be more historically accurate to have the full map?  This adds extra value to the game.  A minor quibble perhaps but it is kind of nice to be able to tell people that this is the real map from the real campaign!  Full size in all its Napoleonic glory. 

In fact, we’ve had people ordering extra maps.  One to play the game and one to frame and hang up. 

Cons


Increased Cost

The maps are more.  About twice the size of Brandywine.  We also need bigger tubes.  The small cardboard format won’t work with this size.  Shipping is more. 

True, true, true but it felt wrong to skimp when it comes to Napoleon.  We decided to just absorb the extra expense.  It’s worth it preserve Napoleonic glory!   

Playing Out

This battle still plays fast but can you fit that huge map on the bar?  Well, this is a downside.  It won’t fit on the bar.  It does fit on a normal sized booth table.  We tested it at several different bars.  (just to make sure!) 

It is easier to accommodate this than you might think.  The French can just setup Victor and Lannes.  Let the east edge of the map hang over the table edge for turn 0.  The French can’t move anyways.  The Austrians quickly cross the river and deploy on the field.  For turn 1, you can slide the map over and let the west edge drape over the table edge.  Now you can setup the rest of the French and fight out the rest of the battle normally. 

Conclusion


Lots of good pros.  We took care of 1 con, so all you have to do is be willing to slide the map once on turn 1 IF you are playing on a small table.  That’s not too much to ask.  In the end, this seems like a small price to pay for all the great advantages. 


Computer Assisted Wargames

Computer games vs board games.  Which is better?  They both have their strengths and weaknesses.  I always like the “idea” of a computer wargame but I usually don’t like them.  All my favorite wargames are board games.


Computers excel at video and live animation graphics.  This is great if you are playing tactical or first person shooter but my favorite games are operational / strategic.

Board game ‘graphics’ win hands down on this.


You can instantly see the entire map.  No zooming or scrolling around.  You can instantly inspect stacks of units and move all the pieces.  No fuss.  I can’t explain it but there is something important about being able to touch and move the pieces by hand.  


Is it possible to marry the two?  Use the best of both formats, combined into 1 system?  It would be ideal if the computer could handle limited intelligence, complex combat, logistics and order delays.

What is your experience with Computer Assisted Wargames?  Does it work?  Have you ever seen an example of it working well?  Is this an impossible pursuit?


Supremacy -report from the front

I got this email recently.  It isn’t a full review or AAR on Supremacy but it does give you a good independent take on the game.


Game played great.   

As I mentioned in the post, so many of the issues in the original have been corrected.  

– Randomly determining next market trade reduces the amount of control two players can obtain on the markets.   

– Randomly distributing the initial cards allows everyone to start with different resource needs and establishes alliances very quickly.

– Operations for the attacks is amazing.  Allows for very creative attack strategies – multi theatre, blitz, amphibious assault, and offshore bombardments!  So simple a rule but the strategic complexity is huge.  Took a little time to fully appreciate it.  

We used a hybrid rule interpretation for the navel assault (when, if ever, do you spend a full set of supplies and an oil?   It appears the rules initially required the oil but later interpretations ditched the extra oil for just the set of supplies.   We settled on – if the navy and units were in or adjacent to the same sea as the attack location, then no oil is required (just the full set of supplies).  If the assault requires moving into a new sea, pay the additional oil.  So Japan assaulting California would be full set of supplies plus one oil. Japan assaulting China would be just the full set of supplies. 

Japan was sacked on turn 1.  Brazil fell to Europe on turn 3.  The Russian player was the only to develop nukes and the Commonwealth the only to develop Anti ballistic missiles.   On turn 4 it was a conventional World War III with numerous attacks and counter attacks.  The Commonwealth attacked Spain to gain control of Gibraltar, then Italy, France and Saudi Arabia.   The USA invaded/liberated Brazil then attacked a Russian Navy to add them to the War.  Russia nuked the U.K. with 2 missiles, one got through.  The Commonwealth then removed the US force in Brazil with a naval attack.   This prevented the US from gaining a second supply center at the end of the attack phase. 

We needed to end on that turn, declaring a Commonwealth Victory!   They had anti missiles systems, high tech edge, and a second supply card.

With the older rules, the games usually degenerated into a Nuclear winter.  With these rules we had a much more conventional World War III  with a very limited Nuclear exchange.   

Looking forward to playing again!!!

David

Waterloo Colors

What colors should we use at Waterloo? 

I love the contrast for the British at Brandywine:  bright white and royal red. 


By Waterloo, trouser colors changed to grey. 

These don’t look as sharp.  What should we use? This grey?  White?  Maybe a lighter shade of grey?


This is what we have for the Prussians:


We were a little concerned at first that blue might be a problem distinguishing Prussians from French:


The French blue is much darker.  I don’t think this will be a problem at all.  Here they are next to each other:


What do you guys recommend?  What would look best?  What would you like to see?


Here is a new color test.  What do you think of these?

The outside British stickers are a very light grey.

Wargame Military T Shirts

Wargame T Shirts based on Military History:  Army of Northern Virginia, Potomac, Napoleonic Flags, Ancient Rome, 7th Cavalry.


I’ve always wanted to have some cool T shirts based on my favorite hobby:  wargaming.

We found a great new supplier that can make good quality shirts, quickly and lots of variety.  We are working on a series of Napoleonic shirts now.  Next we are going to start on WWII shirts.

Don’t see what you want?  Let us know.  We’ll make it!


You can check out all of our new shirts here.

Sun Tzu at Brandywine

“To unfailing defend, defend that which is never attacked. To be unfailingly victorious when attacking, attack that which is never defended.”


How would Sun Tzu command the Colonials at Brandywine? Are there any lessons here we can learn from his wisdom? 

Washington came up with a plan. He prepared for the British attack.  Sun Tzu would say this is a mistake.

 “Do not attack the enemy.  Attack the enemy’s plan.”  

Attacking the enemy’s plan is exactly what the British did. How could Washington have attacked the enemy’s plan?  He couldn’t.  He had a failure in intelligence.  He didn’t understand the true enemy’s plan until it was too late.  At the real battle, Washington was caught by surprise.  He deployed assuming the enemy’s approach.  This is why Sun Tzu strongly emphasizes intelligence gathering.  If you don’t know what is going on or what the enemy is up to, how can you attack his plan? 

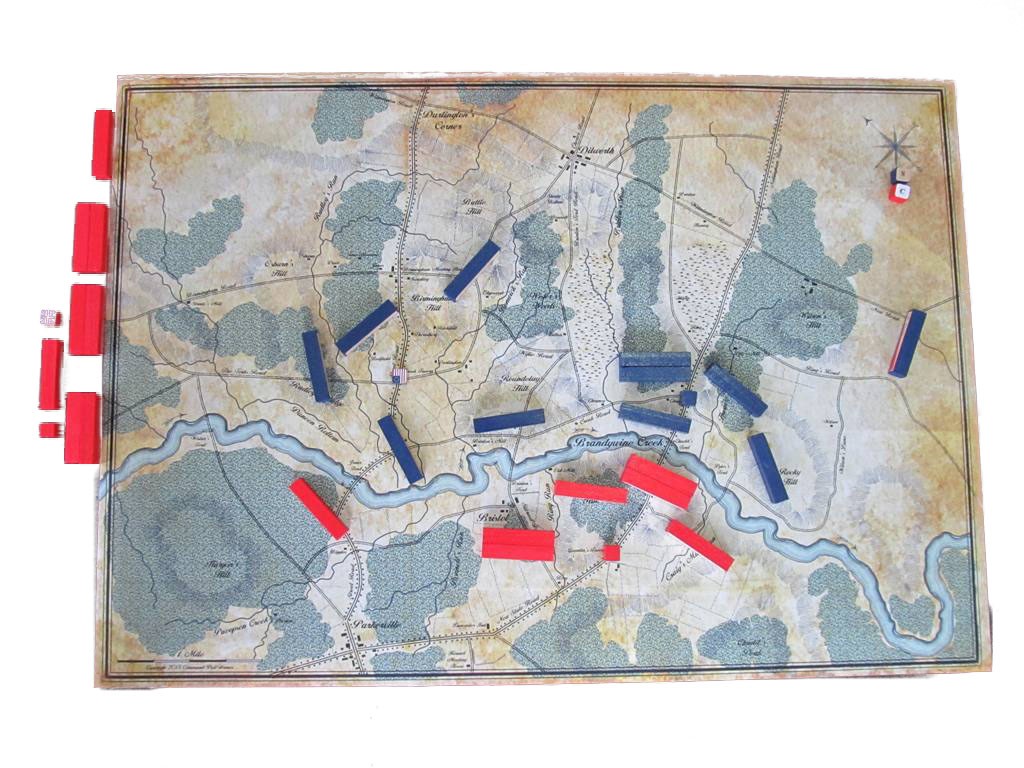
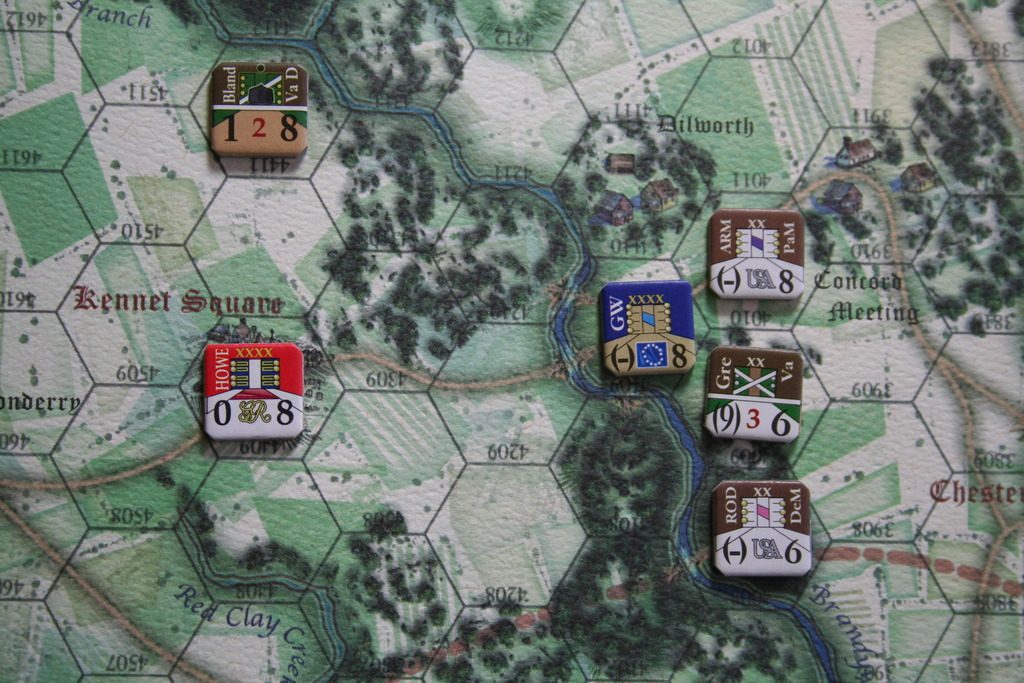
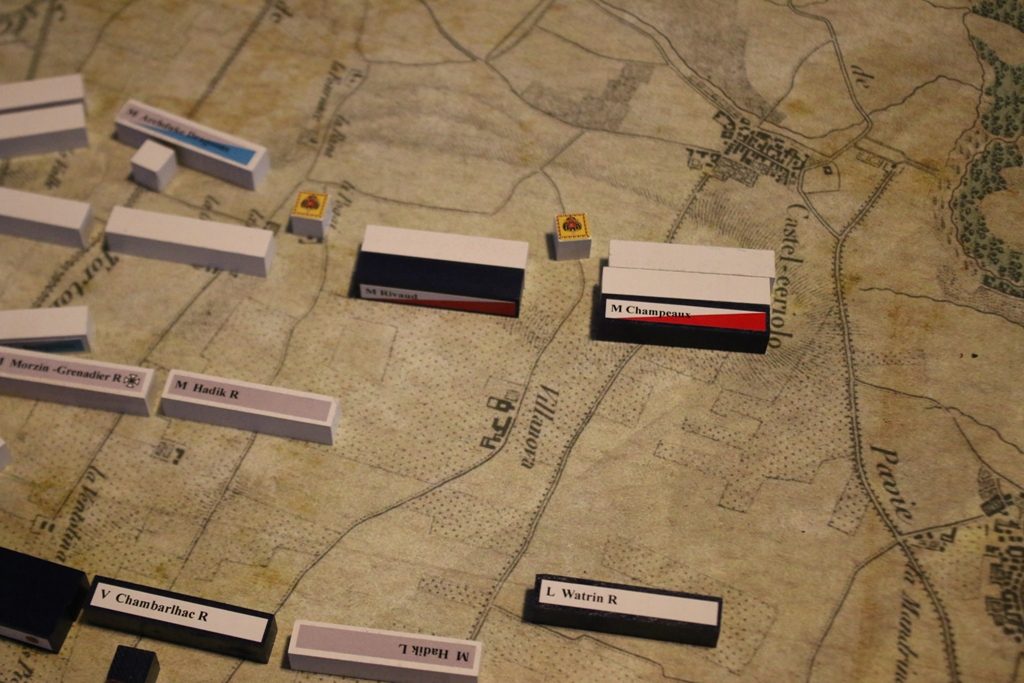
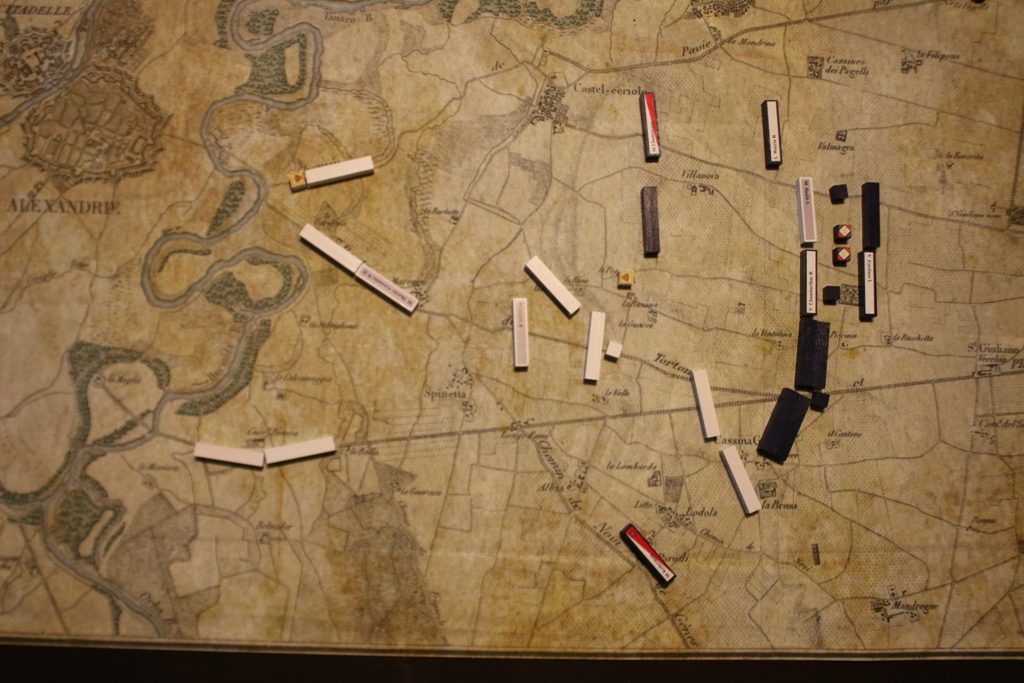
How can you re-create the element of surprise in a game? You have the historical map.  The historical OB.  The British are flanking.  There is no surprise to the player in most games like this.  Often times games like this come with ‘bandaid’ rules.  Rules that handcuff players and force them to do stupid things.  Force them to sit for several turns of delay before they can respond.  Other games on Brandywine force the Colonials to setup historically.  They begin the game badly out of position.  This is not so in Pub Battles.  

Remarkably, the Colonial player is free to setup anywhere he wants. Free to have any plan he wants and react immediately.  How could that work in a game?  Wouldn’t that doom the British to an automatic defeat?  No.  This is something Pub Battles pulls off remarkably well.  The Colonials are truly surprised.  How?  Because they must setup first.  The British setup second and can enter on either flank.  As a result, the British can ‘see’ the Colonial plan and then attack it! 

This does an amazing job of recreating the historical sense of panic and urgency in the Colonial player. The game starts off and feels like a scramble for survival.  This is what the battle really was.  It is recreating the historical feel.  What can the Colonial player do?  This is a significant handicap.  Can the Colonial player ever win?  How should you setup?

First of all, if intell is your biggest concern, what can you glean from the British Wing deployed on board? Where are they?  What is there intent?  What does that tell you about where the flanking wing is likely to attack. 

I feel it is a mistake for the Colonials to setup committed to any specific course of action. You are supposed to be receiving an attack.  Not launching one.  You do at least have the foreknowledge that a surprise flank attack is possible and in fact very likely.  Also consider that you have a massive intell failure.  Where is the enemy?  Where are they coming from?  Before the game, you have no idea. 

How can you ‘attack the enemy plan’ if you don’t even know what that is? In this situation, I think Sun Tzu would say: Be mysterious and formless. Gathering intell is your first mission.  How do you setup before you have any intell?  In a mysterious and formless void.  Napoleon liked the central position.  This is a position of power.  This situation calls for the bulk of your forces to be held in a central reserve, surrounded by a thin, delaying screen for recon.  All roads should be blocked to prevent a rapid road march deep into your interior.  More cavalry would be helpful but you only have 1. 

Think about this from the perspective of the British. How do they attack your weakness?  There is none.  You’re just a big scattered blob.  They might as well just flip a coin to decide where to attack from.  Wherever your central reserve is, make sure it is on roads so that they can rapidly respond to the flanking threat. 

Which force should you use as the reserve? This is a dilemma.  Washington’s force can react quicker.  –If using the RPWG, Washington can move immediately without waiting to receive written orders.  This is a nice advantage but Washington’s force includes the Cav, Militia and Artillery.  Greene’s force is larger and contains more brute force.  Which is better? 

Many players want to attack with the Colonials. It may feel good but remember, you aren’t there to defeat the British and win the war in 1 battle.  You’ll be lucky to survive.  Keep the victory conditions in mind.  To ‘win’ you don’t have to beat them.  You have to delay their advance (by holding the major roads) and save your army (maintaining a reasonable balance of losses). 

Keep losses in mind while fighting. This is a common mistake I see Colonial players make.  You want to WIN!  You want to beat the British and throw them back!  The battles can be very exciting.  You take a hit.  The British lead piece doesn’t but it’s not an elite.  You don’t want to run away.  You want to hold the position.  You want to WIN right? 

You want to win the battle, NOT this particular combat. Do you have to win this fight?  How critical is it to winning the battle?  If your lead piece is flipped but the British lead is not, there is a much bigger chance that you will lose that piece if you fight another round.  That will cost a VP.  What is the current VP count?  Can you afford that loss?  If you retreat from this fight, can you still have a reasonable chance of holding the major roads before the battle is over?  All too often I see Colonial players losing points on casualties over battles they ‘want to’ win, not ‘have to’ win. 

How do YOU play the Colonials? What is the best setup?  What is the best defense?  Do you have a favorite?  What seems to work the best?  What works very badly?  Share your thoughts here!


French Strategy Guide for Marengo

Lessons From Marengo

What does it take to win in Pub Battles? What skills are rewarded by the system?  Play testing this battle has given me keen, new insights into not only this battle but the entire Pub Battles system.   


New players often fight every round possible until they either win or are destroyed. If you do this, you are leaving the game up to fate. You can mitigate much of the luck factor by exercising good discretion. Remember that additional rounds are OPTIONAL. Before you agree to fight another round you need to ask yourself some very important questions:  This is especially critical for the French early on. Initially, they only have 6 blocks to stop an entire Austrian army of 18 blocks. EVERY piece is critical. What is the best you can accomplish by staying a 2nd round? You might kill an Austrian piece and delay the Austrian advance for a turn. So what? If the Austrians drop to 17 blocks against your 6, that won’t hurt them much. What happens if you lose? Now you only have 5 blocks to stop 18. That is WAY too big a risk to take. You must fall back. You don’t have to win every fight. Keep your eyes focused on winning the battle. Walk away. There will be a better time to fight.

How critical is this particular fight? How important is it to the battle? How badly will nearby units suffer if this ground is lost? What is the current force ratio? Every loss is critical. If you lose 1 more piece trying to stay in this fight, how will this impact your army as a whole? Will you still be able to face the enemy across the field effectively if you lose this piece (or pieces)? You have to carefully examine your risk/reward ratio. What do you stand to gain vs what you stand to lose?


I love the clear open terrain at Marengo. I love the huge force disparity. It really brings the fundamentals of maneuver, force and position into focus. You might be wondering how 6 blocks can fight 18. Note this picture from a historical opening:


The Austrians have just crossed the river. Yes, they have 18 blocks but most of them are bottled up behind lines in a traffic jam. How many blocks can they present to the front? Only 3. How many blocks can the French present? 3. There you go. Those 18 blocks don’t matter. They cannot be brought to bear.

Now the French must fall back at some point to prevent losses, as previously discussed. As they fall back, the Austrians can expand the front and bring more forces to bear. Fine. What can the French do then? Fall back again. Falling back prevents your flanks from being turned. It prevents the Austrians from being able to bring their power to bear. You trade ground for time. You also greatly limit the damage the Austrians can do to you. Those 18 blocks mean nothing if they can’t get a hold of you or do any damage.

Another interesting result of running, is that it virtually negates the massive Austrian artillery advantage. As you fall back, the Austrians race to keep up. The guns fall behind. They are almost always out of range to fire. If they can’t fire, they might as well not be there. Perfect.  


While monitoring your force ratio with the enemy, you should also keep an eye on the number of spent units.  What portion of your army is fresh vs spent? How does this compare to the enemy?  Ideally, you would like to see a mostly spent enemy army vs your army that is mostly fresh.  This is a position of strength and power.  The French will likely find themselves on the weaker side of this curve.  That’s ok.  It just means that now is not the time to stand and fight. Fall back and as you do, try to get some portion of you army back on line. In the mean time, try to flip a few Austrians along the way. Remember, they can’t rally either while they are pursuing you.


Desaix’s arrival is more important than it seems. He only has 2 blocks to reinforce with. That may not seem like much but it is likely all it will take. Have you ever spotted a weightlifter? Have you seen how little force it takes to help him lift the last rep that he can’t do on his own?


By now with some luck, you have picked off a few Austrians with judicious Cavalry and Guard charges. The Austrian army is now spread out and thinned. If you listened to me and didn’t squander several blocks to stubborn, unnecessary fights, you should be getting close to parity. It may not look like it but always remember: 4 of those blocks back there are artillery. You will run those down easily once you break this line in front of you. You also don’t even need ‘parity’. Remember that you have the Consular Guard and Murat’s Cavalry. Those units are easily worth double their number of Austrians.  


Marengo teaches you a keen sense of timing. There were many times with the French I wanted to strike back. I wanted to attack and halt the relentless Austrian advance. I could have but it would have cost me the battle. You have to charge when the enemy is spent.

There were several turns I wanted to charge but I didn’t get the timing sequence I needed. The Cav missed their roll then bam, the Austrians rallied. The door of opportunity shut before I could strike. That is ok. Bide your time. Have patience. Wait it out. Keep your Cavalry ready to charge. They should be fresh and positioned behind lines to strike anywhere along the enemy line. This alone should force the Austrians to slow down and advance with caution. The Austrians won’t get lucky on timing every turn. Eventually, you will get the right timing sequence. The Austrians will be repulsed and spent. Your Cavalry will get the next move. Imagine the damage your Cavalry could do with a double move turn sequence! You could shatter 3 spent Austrian infantry, THEN charge again hitting 3 artillery behind lines! That is 6 kills in 2 successive moves.


This illustrates why exactly patience will pay off. It only takes 1 or 2 breaks in timing to crush the Austrians and win the game. This won’t work if you insist on attacking when YOU want to. You must wait for the right time to arrive. I can’t find the exact quote now but I remember Napoleon describing the critical timing moment in battle when victory is achieved. He said it was like adding the last drop of water that causes the dam to overflow and break down.


“This is why it is said that victory can be seen but not made.” -Suz Tzu  

Museum Quality Game

Well, I always say our maps are “museum quality”.   It’s not just marketing hype now, this game actually IS in a museum!!  Amazing!  Pub Battles are in an exhibit on display at the Washington County Historic Courthouse .  These aren’t the best of photos but check it out:


Here is their FB page:

https://m.facebook.com/washingtoncountyhistoriccourthouse/


The museum is using them as part of their Civil War exhibit to show the position of the armies for the battles of Gettysburg, Antietam and Manassas.