We have several new videos out on Pub Battles, if you haven’t seen them yet. We’ve been very hesitant to do any because making good videos is very hard. Most wargame videos are like watching paint dry!
We’ve tried to keep most of these really short and to the point. Let us know how we did and if you want to see more. Watch our Youtube channel to see more coming out.
If you’re new to Pub Battles, here are some rules tutorials to get you up and running quickly. They can also be good to confirm you’re doing things right.
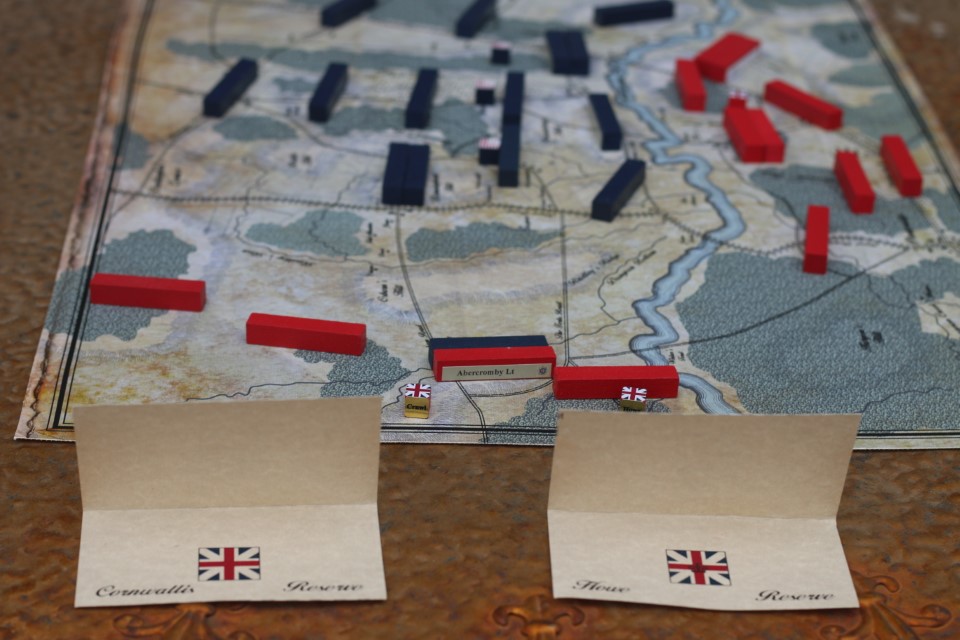
How do you win the game in Pub Battles? I love the new Victory Conditions. They are much more in line with real military objectives. They sound real and feel real. Games can’t always do this but I love it when they can describe things in real world terms.
For example, how do you win?
Be the first player to reach 20 points.
OR
Defeat the enemy army.
Ok, the second victory condition here sounds much better but what does that mean in game terms? As a gamer, this feels a little fuzzy. How do we do that exactly?
I got this question via email today:
What are the concrete victory conditions for Marengo? Is it to destroy the opponents army, or exit off the boards…?
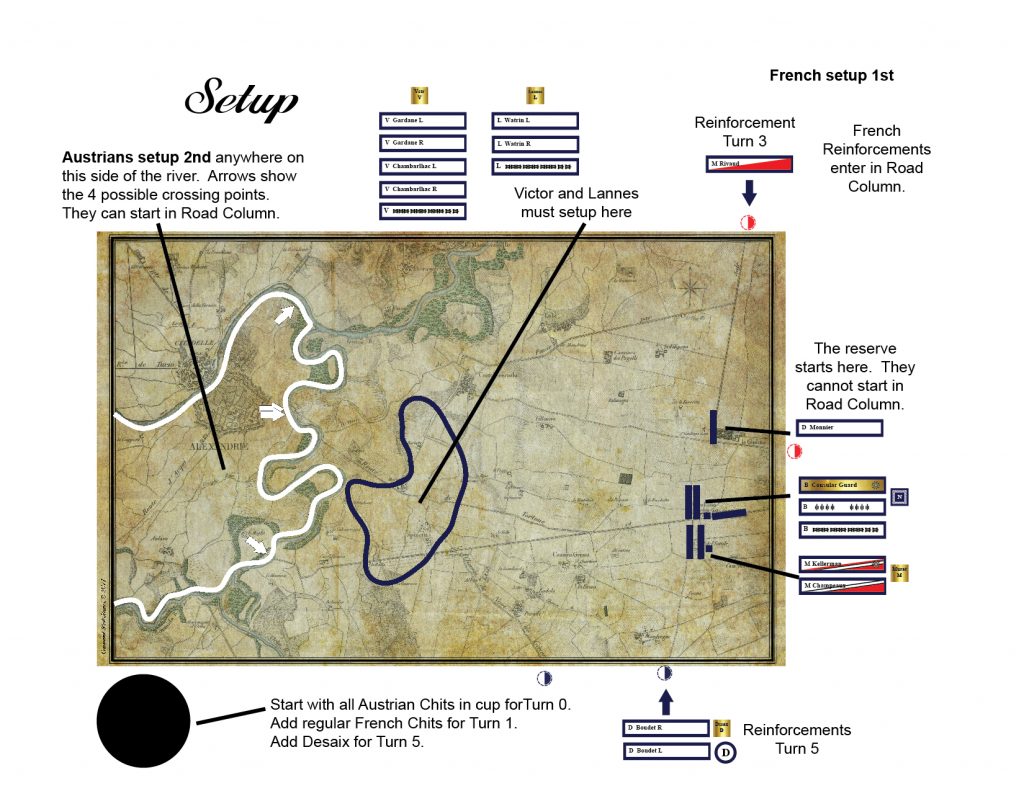
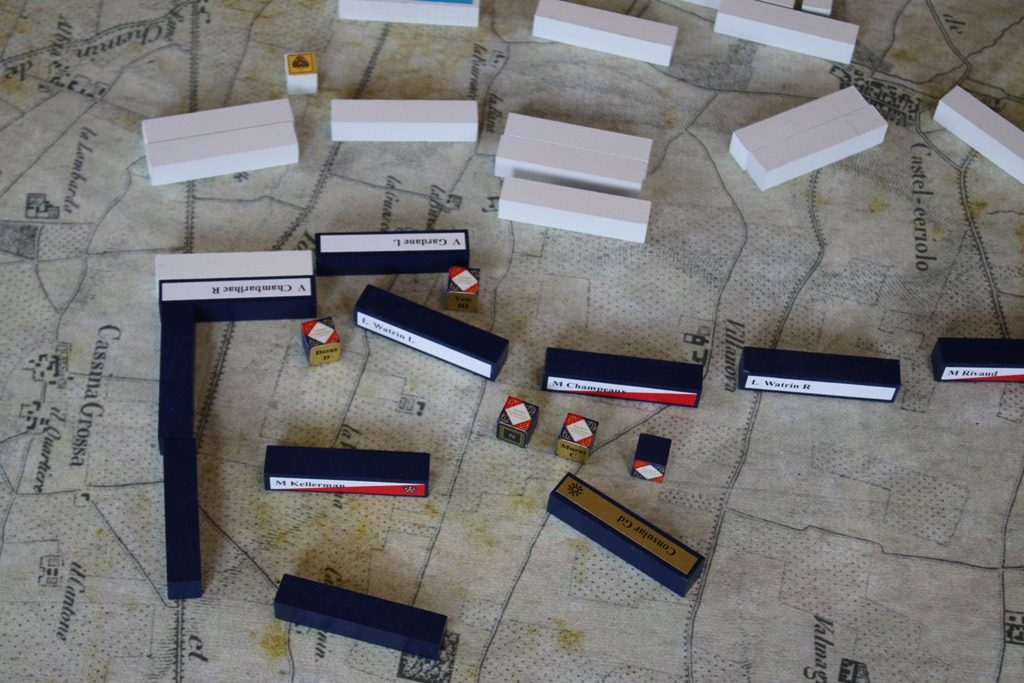
Let’s take a look at the rules. What is the Objective for the Scenario?
Both sides are running out of time. The French are sitting on the Austrian supply line! The Austrians MUST breakout and reestablish a supply line to the north or east. The French are also in a very tenuous and overextended position. They must defeat the Austrian army to end this campaign.
Ok, so let’s break this down. The Austrians MUST breakout. They can’t just carefully attack and then
fall back if things start going bad. An
Austrian controlled retreat back to base at Alexandrie is a fail: They lose.
The Austrians can win by marching out of Alexandrie and off the board along their marked north / east supply lines. I’m pretty sure the French are going to have a lot to say about that. So the Austrians are going to have to fight their way through the French army to get to those supply lines.
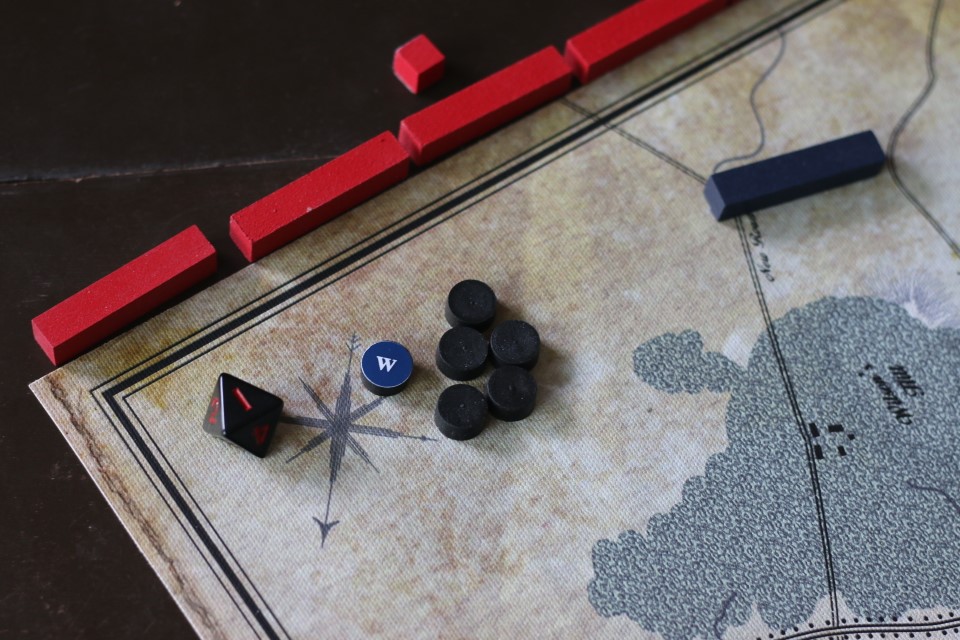
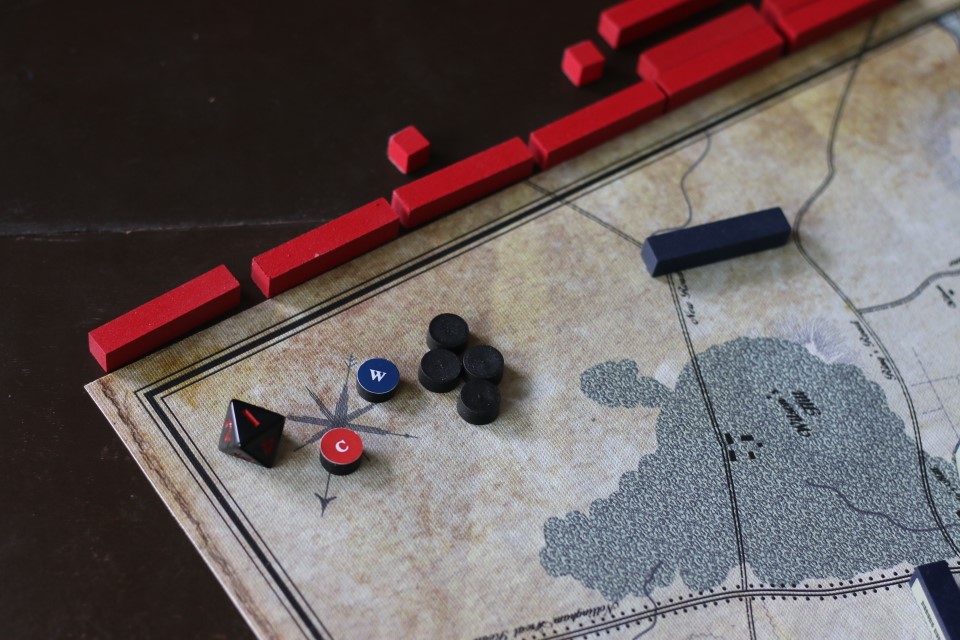
Note: The Austrian Supply Lines are the Red Supply circles on the top and right.
These are the Victory Conditions for the Scenario. The standard Victory Conditions from the
basic rules are also in play. So if the
Austrians are ‘routed’ (suffer 50% losses) while trying to breakout, they
lose. They also lose if the French can ‘break’
them (sack an Austrian baggage train) while trying to breakout to the north
east.
What about a ‘forced back’ result? The Austrians deploy for battle, fight the French, clear a supply line, then pack up their trains and march safely off a supply line while keeping their casualties below 50%. That sounds pretty good to me. I’d call that a breakout: Austrian Victory.
Of course this would all be much more simple, if the
Austrians just march out there and destroy the French. If they can ‘rout’ or ‘break’ the French
army, then it is pretty easy to establish your supply line again right? Heck, you don’t even need to at that
point. You just defeated Napoleon. The campaign is over!
So what is the answer to our email question? Is the objective to exit off the board or destroy the enemy? In short, it is both. All of the above.
See how this is much more in line with real world, military terms? How do you win? It’s complicated. –but it makes sense. Much better than something like: be the first player to get 20 points.
We like to get gamers thinking like real officers, not gamers. The real world is messy and complicated. Yes, you’re gonna have to use your brain and think about things. It’s not going to be that simple but that’s good! That’s the best kind of learning and training you can do.
If you’re like most gamers, you like playing games but not learning new rules. Some times I enjoy reading them if they are really interesting and on a new subject I want to learn about. Most of the time, they are just a chore. Can’t I just plug into the Matrix and download the rules into my brain in 2 seconds?
We can’t do that yet but this comes close. We’ve got 3 new Youtube videos that walk you through the basics. This should get you going and shoving blocks around quick.
We’re not covering every possible rule and nuance. That gets too long. Once you start playing, it’s easy to look up a rule if you need it.
Let us know if you like these and want more!
Yeah, sorry about the cat and my crazy hair!! I know.
I’ve heard several wargamers say that Block games can’t be played solitaire. I strongly disagree. In many ways, I think they are easier to play solitaire. There are many advantages. Block games do present a few challenges for solitaire play. Here are some tips to help you along!
First of all, what’s the big deal? What is so different about block games? The key difference is that the unit types and strengths are usually hidden. Something akin to Stratego.
Most of the time, you can see only your forces. Enemy forces remain hidden. -Euro Front from Columbia Games
East Front -Columbia Games
Doesn’t that make it impossible to play solitaire? I KNOW what the enemy has and where. I just saw it! I KNOW what that piece is.
True, true but we are already used to that with solitaire
play right? We KNOW what the enemy plan
is. We KNOW what they will be trying to
do over the next few turns. We already
have methods to work around this right?
Pretend you don’t know. Play AS
IF you didn’t know. Imagine that you
were the enemy and didn’t know what was coming.
What would you do then? Guess
what? This still works exactly the same
with blocks!
Spin the Board
In fact, I’d argue it is even easier to play solitaire with blocks. In most games you can see all the pieces all the time. You know exactly where all forces are: friendly and enemy.
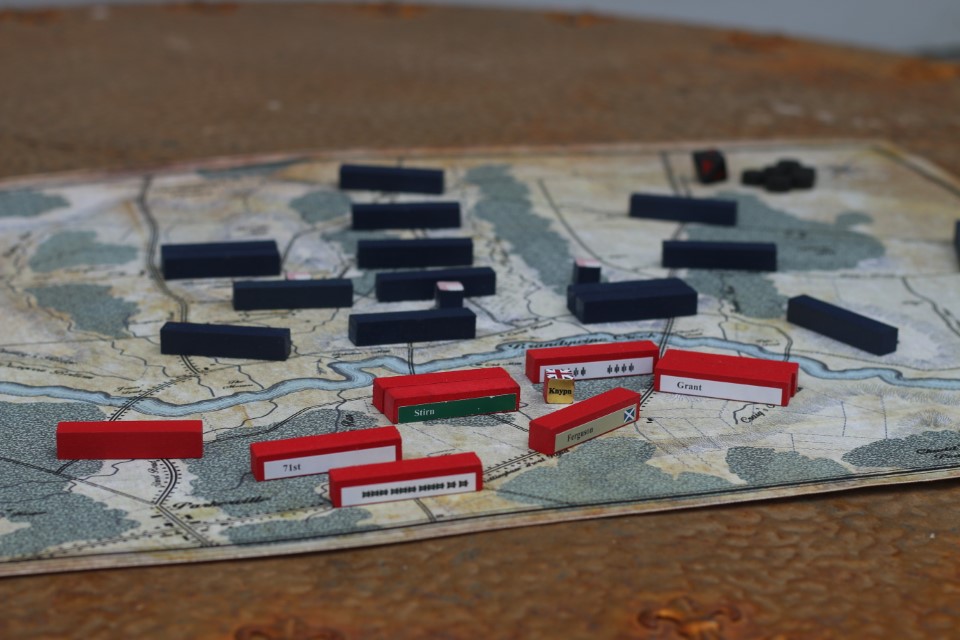
British point of view at Brandywine
Walk over to the other side of the table and look at the board again. The change of perspective makes it easier for me to forget what the other side was doing. Most of the time, I forget what exactly was there. It just looks like a sea of hidden blocks now.
View of the very same British from the Colonial perspective. Remember what each of those red blocks were? What if there is more hidden in reserve?
On occasion, I do actually remember some of the blocks. If you do, no big deal. Pretend you don’t. Analyze the situation as an unknown. If you were the enemy and didn’t know what was going on, what would you think? What would you know? Why? How could you know that? Guess what? If this is the only thing you know right now, what would be your best course of action? This is GREAT training for how you should be thinking and analyzing all the time anyways!!
Let’s look at some examples:
Brandywine
Ok, now here comes the British flank attack!
Fine but as the Colonial player, we still don’t know where the main threat is. What kind of troops are in this flanking attack by the British? Just a bunch of light troops to distract us from the main force to our front?
Note: there is nothing held in reserve on the cards but the Colonials can’t see that.
Or is this the real deal, with all the heavy hitting elite units backed up by a strong reserve.
The HQs (flag cubes) can hide pieces at their location on these cards. Here they are backed up by artillery, elite & regular troops and baggage. Note the units on the far left are full strength cavalry and Hessians, not just a light screen of detachments. This is a huge threat to the Colonials!
What would you do here as the Colonials? If you’re not sure this is a feint, you kind of have to respond as if it were a real attack right?
Gettysburg
It is the end of day 1 at Gettysburg. The Confederates have been driving hard all day. The Federals are paper thin.
The Feds have their HQs up behind their front line in support but there is no one left in reserve. What is on the field is all there really is but the Confederates don’t know that!
Empty reserve. The blank block over on the left is a 1 step detachment screen. That block behind the front line is the Baggage Train. If the enemy hits that, it’s game over!
Let’s take a look at this from the Confederate perspective. IF we knew that’s all there was, we’d launch one final push to knock them out. –But what if we didn’t know? Hmmmm….
Confederate perspective. Looks good but is it really?
The Rebs have taken lots of losses today too. What if they attack, and push hard to fight through a possible 2nd Federal line? It would be very likely that they lose 3-4 blocks. (because they are already spent and fighting up a hill into difficult terrain.) That would devastate their ability as the Confederates to fight into a second day.
Would you be willing to gamble the entire battle, entire war on this one desperate attack? Would the Rebs have any indication of the strength of the Federal reserve now? How many units have they seen today? How many losses did they inflict? How many pieces are they likely to have left? How many Federal pieces have they spotted earlier in the day that are currently unaccounted for? Have the Feds been maneuvering throughout the day in such a way as to keep their forces hidden from the enemy? What does that look like? What things give away your strength and intent?
Alternatively, the Federal forces could have a real, fresh reserve. Wadsworth (an elite unit) is supporting Robinson. Barlow could easily move to back up Schuz on the right.
When you are thinking and playing like this, you are playing Kriegsspiel. This is REAL wargaming. The difference between god like knowledge of everything and playing as if it were real.
Train as if it were real!!
That is the very best training there is. The more you put in, the more you get out. This can still be very effective, even solitaire. In some ways, it’s even better.
As a new wargamer in a small town, solitaire play is about your only option. Wargamers are far and few between. Many times that is our only option. Unfortunately, wargamers are often forced to become experts at solitaire play. Is this worthwhile? Is it good to do? Does it teach you bad habits?
“What are you doing?”, my aunt asked. “Oh, just playing a new game I got.”, I responded. “Who are you playing with?” she asked. “Nobody. I’m just going through it on my own.” I said. She burst out laughing so hard that she almost fell down.
She made a few silly jokes like, “How do you know when you’ve beaten yourself?” and “Do you get mad at yourself when you lose?” Interspersed with generous rounds of continued hysterics. She was mostly having fun but she really did not understand how playing a game by yourself could be possible at all.
This can be a huge stumbling block for new players trying to
start in the hobby. In addition to
learning a new hobby and game system, most likely they will have to figure out
how to play without an opponent.
Wargames don’t come with instructions on solitaire play. It can be difficult for new players to figure out but I’ve even noticed that veteran wargamers sometimes struggle with this. I’ve heard wargamers often declare games as unplayable for solitaire; the very games that I find fascinating in solitaire play.
My aunt’s question was valid. How is it even possible to play a game
without an opponent? Here are some tips
to help you get started if you are new.
Veteran wargamers might also find a few new insights they haven’t
thought of before as well.
Goal
The main difference I notice at first is the primary
goal. WHY are you playing? In regular games, you play to win! If you are playing both sides, that doesn’t
work. What does that even mean? For solitaire play, we need a new goal.
Here is the key
difference: The goal is not to win.
The goal is to learn.
This focus changes our entire perspective on the game. We don’t care anymore who wins. This frees are mind to really learn. Learn things you might not otherwise. Learn the rules of the game better but also
lessons on tactics, strategy, history and leadership.
Play both sides to the best of your ability.
Actually, (yes, I’m contradicting myself here) we do care who wins. We want both sides to win. When you make a move for a side:
make the best move possible, for that side, given the current situation.
Defense: Ready for Anything
Usually there is a weaker, defending side and a stronger offensive
side. I find that it works well to set
the defense up first. What will the
offense do? I have no idea. I haven’t even started to think about that
yet. How should you set up the
defense? Where is the enemy most likely
to attack? Where are you weak and
vulnerable? What key areas MUST be
held? When I set up the defense, I try
to set them up for maximum flexibility.
Be prepared for ANYTHING. This
usually means a light setup along the front with a strong, mobile reserve force
able to respond where needed.
Example:
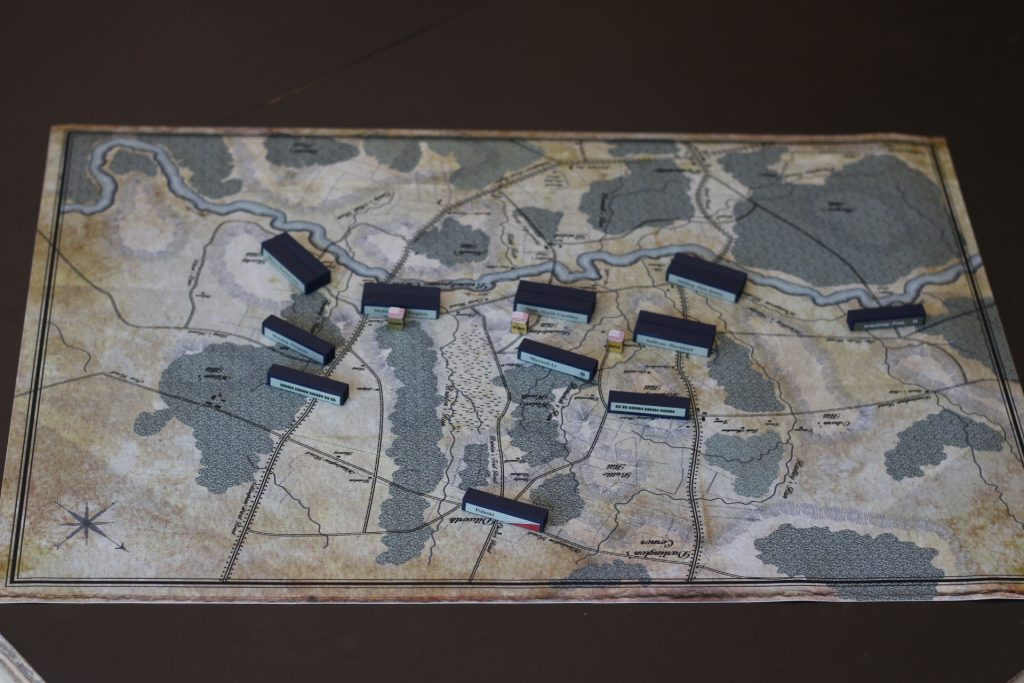
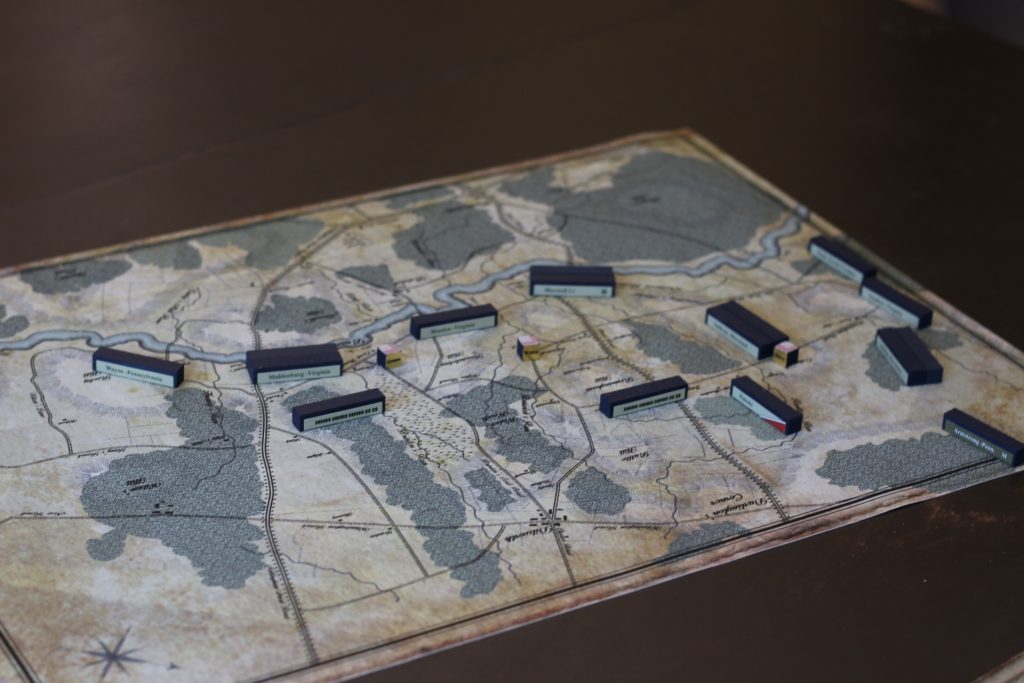
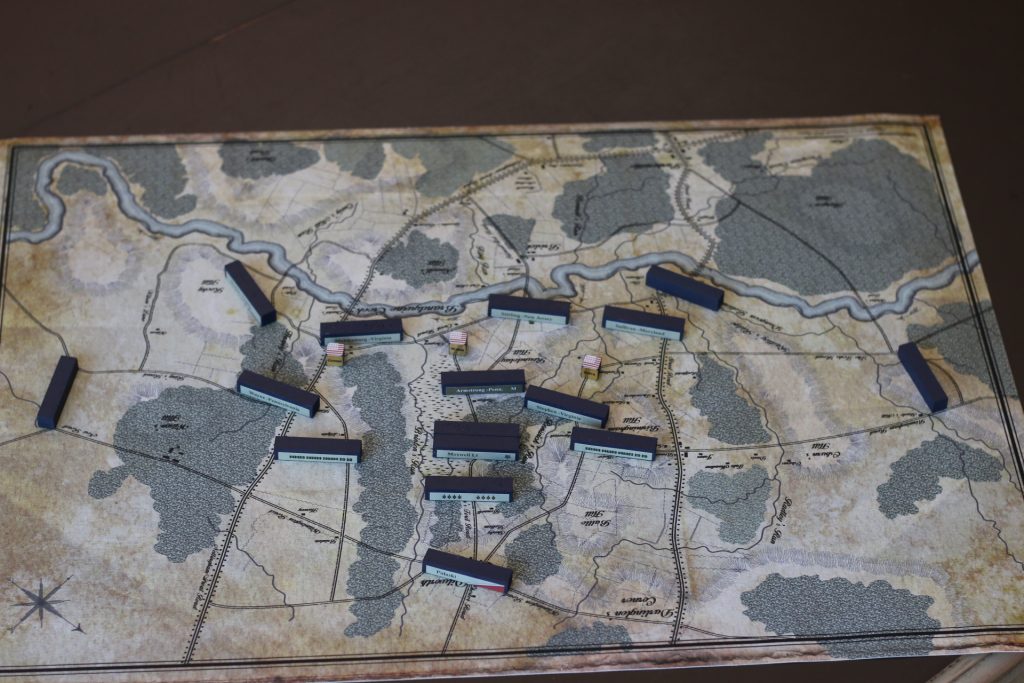
If I knew the British were going to launch a frontal attack across the river, I would deploy the Colonials like this at Brandywine.
If I knew that Cornwallis was going to be flanking me on the right, I would set the Colonials up like this.
Not knowing anything, I would setup more like this. The Colonials are lightly covering both flanks and main river crossings with a strong central reserve. From this position, they can delay the main attack and respond with their reserve, once they know where it is.
Forgetting Break
Once the defense is setup, it is a good time to take a
little break. Go to another room. Have a snack.
Catch up on emails, texts, posts, etc.
Forget about all that. Set it all
aside.
Offensive Plan
Next I like to start thinking about an overall offensive
plan. Where will we strike? What do we want to accomplish? How will we defeat the defender? Reading some historical accounts can be a
great source of inspiration. Often you
will hear an armchair historian claim that this particular moment or decision
was the key to the entire campaign / battle.
It was a huge mistake and resulted in defeat. If only this general had done this
instead.
Interesting. Is it true? This is an aspect of our hobby that I find most fascinating. Wargames give us a chance to actually test and try these theories out!
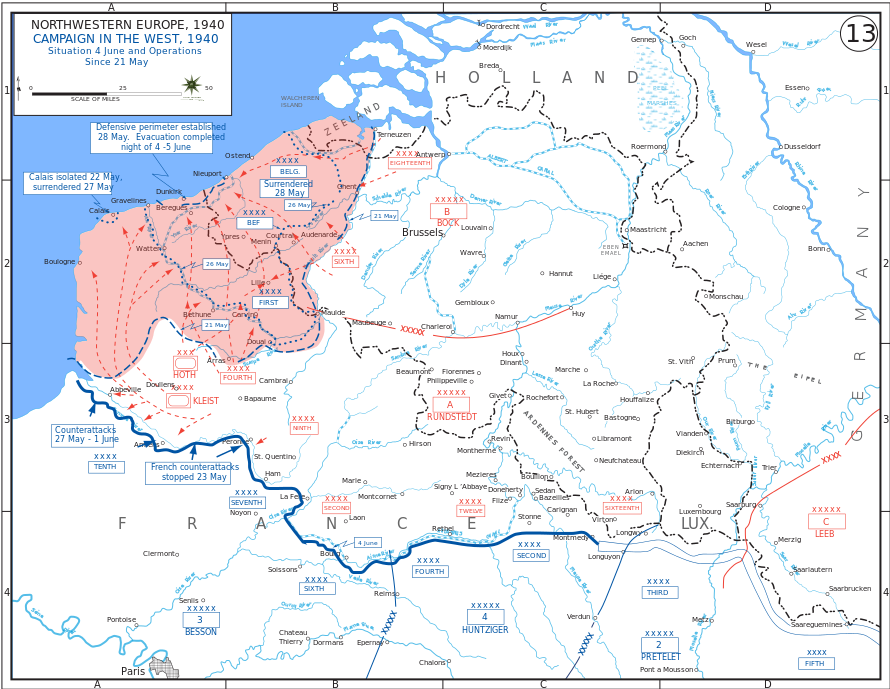
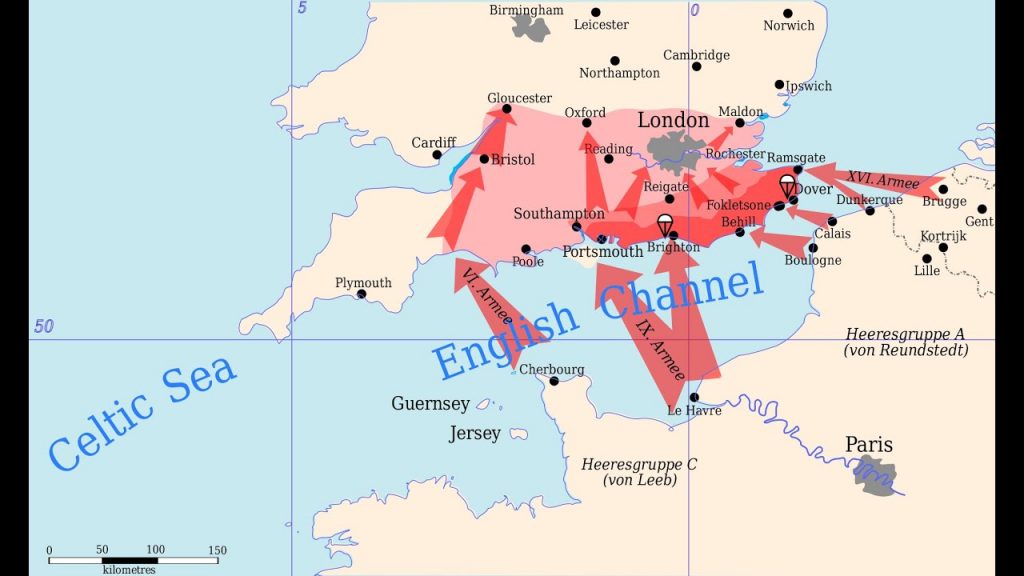
Example: If only Hitler had pushed a little harder, he could have destroyed the BEF at Dunkirk. Germany would have won the war right then! There is no way Britain could have continued to resist. They would have been forced to negotiate surrender. Really?
Let’s find out! Let’s
play a good strategic wargame on WWII.
Set it up starting in summer of 1940.
What do the Germans do?
Everything they can to ensure the destruction of the BEF. What happens?
Can they easily invade and conquer the British Isles now? Exactly how would you conduct a Sea Lion invasion? Fascinating to see how this could play out.
How does the defender setup?
What does the defender do? This
is a critical part of solitaire play.
Also why it is best to set the defender up first, before you have an
offensive plan. Remember, you’re not
playing to win. You are playing to
learn. Set the defender up as they would
have historically. Once the game begins,
try to play the Allied side as they would have moved historically. AS IF they didn’t know what the German plan
was.
While playing, you do know what the Germans are up to. You have to set all that aside. Pretend you don’t know. Obviously, if you set up and play the Allies
with the intent of saving the BEF being the first priority, then you will
right? Set the BEF up in Brest and
immediately move them back to Blighty on turn one. There.
Mission accomplished. What is the
point of that? What have you learned?
Actually, there is an interesting lesson here too. It reminds me of Sun Tzu. The best plan is one designed to defeat the enemy’s plan. The problem is, we usually don’t know what the enemy plan is. We have to try to figure that out on the fly.
Play the defense according to what is best for them. Set them up AS IF they didn’t know what was coming. Play them AS IF they didn’t know what the enemy was going to do next. IF they didn’t know, what is their best move? What would they most likely do? Don’t jump the gun.
Here is another key question: When would they know? At some point, the British had an ‘Oh #$@*!’ realization that the BEF was in trouble. How are we going to get them out of there?! When would that moment happen? What would trigger that realization? What would the Allies do then to save the BEF?
Example:
It is turn 1 at Brandywine.
Wouldn’t you know it, Washington gets picked to move first.
He is in command of the central reserve. What should he do? The British haven’t moved yet. Since we are running both sides, we DO know that Cornwallis is planning to flank on the Colonial left. Great but Washington doesn’t know that yet. We can’t rush Washington over to his left now. The Colonials, at this time, have no idea where Cornwallis will strike. What does Washington know? When will he know it?
The best choice here is for Washington to delay his move. With a little luck, this could result in Cornwallis moving first, which would allow Washington to respond this turn. If Washington is forced to move first, he should simply pass. At this point, he would have no intell to act on.
If Cornwallis is picked to move next, he will also attempt to delay his move. Why? Because he wants to keep his intent hidden for as long as possible. Ideally, the British want the Colonials to waste their first turn passing. If the British can move first on turn 2, they will in effect get a double move before the Colonials can even do anything. That could be a devastating blow!
Play the offense according to your pre determined plan. I generally won’t change the offensive plan unless it goes terribly wrong. If it does, it might be time to pull the plug and start a new game. Sometimes not though. This can be an interesting situation too. It happens in real life. The plan failed. At what point do you realize this? At what point do you admit defeat? What is plan B? What can you do now? Given this, is there another way to win?
Wrestling with questions like these is not only great training, it is very rewarding and great fun!
This goes back to our earlier questions: Is solitaire play a waste of time? Detrimental to understanding military science and command?
No! We find it extremely useful. Even if you were constantly surrounded by lots of eager wargame players, I would still recommend playing solitaire once in awhile.
There are many things you can learn more quickly and deeply
by playing solitaire. It will make you a
better player. It will make you a better
leader / commander. Solitaire play
trains you to think from both sides.
This is a critical command skill.
It is easy to see through our own eyes.
How does the enemy see us? What
do they know? What don’t they know? If we move here, how will that look to the
enemy? When will they realize what we
are up to? What is the enemy’s
intent? How can we conceal our own
intent?
Solitaire play teaches you to see through the enemy’s eyes. This is a real world training benefit that is
priceless. Some of the best training you
can ever do.
–Even though silly aunts may not be able to stop laughing.
We are going to consolidate Brandywine, Monmouth and the new Germantown into one Campaign set.
Brandywine will be the main game that includes the blocks for all the battles. Monmouth and the new Germantown scenarios will be like the Waterloo expansions: Ligny, Quatre Bras and Wavre. They will just be maps and scenarios. No blocks. This will make them much cheaper and lower the average cost of the battles!
If you have the old Brandywine, no worries. We will send you an update kit for FREE with another order. We will list these on our products page when ready.
We are working on Scenario Updates to better fit the 3.0 rules. A couple of the scenarios will need new stickers and a few extra blocks. We are putting together Scenario Update kits for this. You will be able to add these on to orders for FREE!! We’ll post these on our Products page as they are ready.
What is the best name for the new Dispersed units?
We have lots of wrong answers. Help us out! What is the best thing to call these things?
This is what we’ve tried so far and the problem with them:
Dummy Units
Everybody seems to have PTSD over early Avalon Hill Dummy units. Nobody likes them.
Skirmishers
This doesn’t really fit the scale. Skirmishers are a part of each unit. Each block has a skirmish line deployed out front. This is a big part of what makes up the Field of Fire. (FoF) If we use this term, it will get confused with that.
Light Infantry
This could be a term but many times Light Infantry were massed into big formations. They were also usually elite units. That doesn’t fit.
Dispersed Troops
We thought this was a term with no issues but apparently not. Some other games must use this as a term for a unit’s status. Like when it gets badly disrupted. Pub Battles calls that “Spent”. Dispersed Troops are not a status that regular units become. They are there own special units. A unit type.
Scouts / Patrols
This is a good term from Kriegsspiel. Scouts and Patrols are only 1-5 man units. They can’t cover much ground or fight at all. They were also mounted. So people will get this confused. Murphy’s Law.
Columbia Games
Columbia Games call units like this: Static units, Garrisons or maybe Cadres. These terms might fit WW2 aplications better. I’m not sure if they fit well for a musket era battle.
So what exactly are they? Mostly, they are blank / decoy / dummy units. You use them primarily for strategic deception. You can also use them to screen. They can actually fight and slow down the enemy.
If this was a more modern era, I’d almost call them recon units. That doesn’t really fit the era though. Hmmmm….
I don’t know the best thing to call them but they are amazing and work great in the game. They give the game the perfect feel. -That IS historical and profoundly realistic.
Managing baggage trains can seem overwhelming at first. As wargamers, we aren’t used to thinking like
this. Does it sound tricky? It can be but that’s what makes it so fun!!! It is worth the effort.
Here is the basic rundown:
1. Combat flips your pieces to Spent.
2. Only Unpacked baggage can rally them back to Fresh.
3. Unpacked baggage can’t move.
4. If your baggage gets sacked, you lose. Game over.
Easy.
Here are a few basic tips to get you up and running quickly:
When to Unpack Your Baggage?
The Baggage Trains are critical to victory. Here are a few tips to get you started and
keep you out of trouble:
Defense
Don’t unpack too soon.
Don’t unpack too far forward!
Example
Let’s say we’re running the Feds at Gettysburg, Day 1. We deployed Reynolds’ I Corp along McPherson’s Ridge. The Confederates launched their first assault. We drove the Rebs back and mostly held. Fantastic but our line is now Spent.
At this point, it is very tempting to unpack. We are off to a good start. If we unpack we can now rally this line and maybe hold much longer!! Sure that’s true but it’s not good enough.
Don’t marry the first girl you kiss! Yes, you need to have commitment issues!!
Unpacking is a huge commitment. Don’t unpack because things are looking good
right now. Sure you may be able to hold
for another assault. Especially if you
start rallying. Maybe you can hold for
another couple of turns. Still not good
enough.
Here is the key question you need to ask yourself:
If you unpack, can you hold this for the rest of the battle?
Yeah, not a few turns.
Can you hold this line for the next 3 days? Come what may? What happens when Ewell comes storming down
out of the north 2-3 turns from now? What
if Jackson and Stuart unexpectedly show up?
Can you still hold that for 3 more days?
I didn’t think so.
With Baggage Trains, you need to think very long term. The whole battle depends on it, so think in terms of the battle.
The beginning of a battle is the trickiest part. You need to be constantly asking yourself
these questions:
Where is the enemy’s main threat? How strong is the enemy? Where can I delay? Where and when will reinforcements arrive? Where can I fall back to? Where can I make a stand and hold for the entire battle? How can I minimize casualties until then?
Blow by blow, as the battle is developing, all these answers
will be changing. You need to constantly
reassess the situation. Where can you
fight? Can you even fight here at
all? Maybe the best solution is to never
unpack. Just fight a delaying action for
a day and then bug out. Sometimes that’s
all you can do. Is this really a battle
you can fight? Is it a battle you can
win?
Once you unpack, things get much more simple. None of that matters anymore. You’re all in. Now the question becomes: How on earth can I possible hold this
line? How can I take pressure off and
distract the enemy? Where are his
unpacked trains? Can I get to them
before he can get to mine?
Did the enemy break through?
Can you counter attack and drive him back? How much longer can you hold out? Is it time to give up and pull the plug? It is much better to voluntarily bug out than
let your baggage trains just get sacked.
Pack up and go home. You can
fight another day.
Offense
For Offense, unpacking is more simple. Two key questions:
Has the enemy unpacked yet? Where?
Do NOT unpack unless you are sure the enemy already has. If you unpack too early, you will be hopelessly overextended for the rest of the battle. You will never be able to mount a serious threat.
Once you are sure the enemy has unpacked, you need to
formulate your overall strategy for the battle.
Where is his line going to be? How
can you crack it? What is the weak
link? Where are you going to make your main
effort? Think long term: For the whole battle, not just the next turn
or two. You need to plan ahead for this.
Wherever your main effort will be, your trains need to be able to effectively support that.
Where to Unpack Your Baggage?
Now that we know when, the next question is where? Where is the best place to locate your Trains? This is fairly simple. It just requires a little careful planning.
Work this backwards.
Defense: Where is the line you plan on holding?
Offense: Where is the defender’s committed line? Where will your line be to assault that?
Ok now, where will your troops be when they retreat off that
line?
Your Baggage Trains need to be able to rally this spent line efficiently. Simple place them where their range will extend over most of this area.
Rally range is 1/3 Mounted move.
Finally, don’t worry too much. You don’t have to be perfect. The enemy won’t be perfect either. Just dive into a battle and try
something. Experience is the best
teacher. “Ah, now I see why I shouldn’t
have unpacked there.” Yeah, well the
upside to making a big mistake with baggage trains is that the battle will be
over soon. Now you know. Now you’ll remember. Now you have plenty of time to start a new
battle.